My Bathroom Renovation Revealed
If you follow us on Instagram you’ll have probably already spied my bathroom reno journery on Instagram Stories and I’m so thrilled to be finally revealing all here on the blog!
Photography Mark Zeidler
When my partner and I purchased the house we quickly decided that the bathroom would be the first room to be renovated. The bathroom was an 80s hot mess! It was cramped and outdated and well, just plain gross. Waterproofing was non existent and the shower was constantly leaking water through to the bedroom next door which has started rotting the skirting and walls (not ideal)! The toilet was situated next door to the bathroom so we decided to knock down the wall in between the rooms, and remove the two linen cupboards which encroached into both spaces to give the bathroom much needed floor space. There is only one bathroom in the house, so it made sense to renovate it prior to moving in. We had two weeks to get it to a functioning stage, and we accomplished that goal with the bathroom being tiled, and the shower and toilet installed. It was another three weeks before we saw the shower glass panel, vanity, wall mixers and LED mirror installed, but my goodness was it worth the wait (its worth noting that if I organised the vanity sooner - which wasn’t possible in this case as we started renovating as soon as we got the keys, we would have finished the renovation in two weeks - just incase anyone wants to know if it’s possible - it very much is!).
So where do you start? First off it’s important to select all of the fixtures and finishes first. A custom made vanity can take about six weeks to make, so get that ordered first. Also if you’re going to replace your window, get that ordered ASAP so when the carpenter is in there he can do it at the same time as his other work. I learnt that lesson the hard way and ended up racing out to a window warehouse at the last minute, where they had standard size windows in stock (a lot of window companies don’t have them in stock – usually you need to order them in).
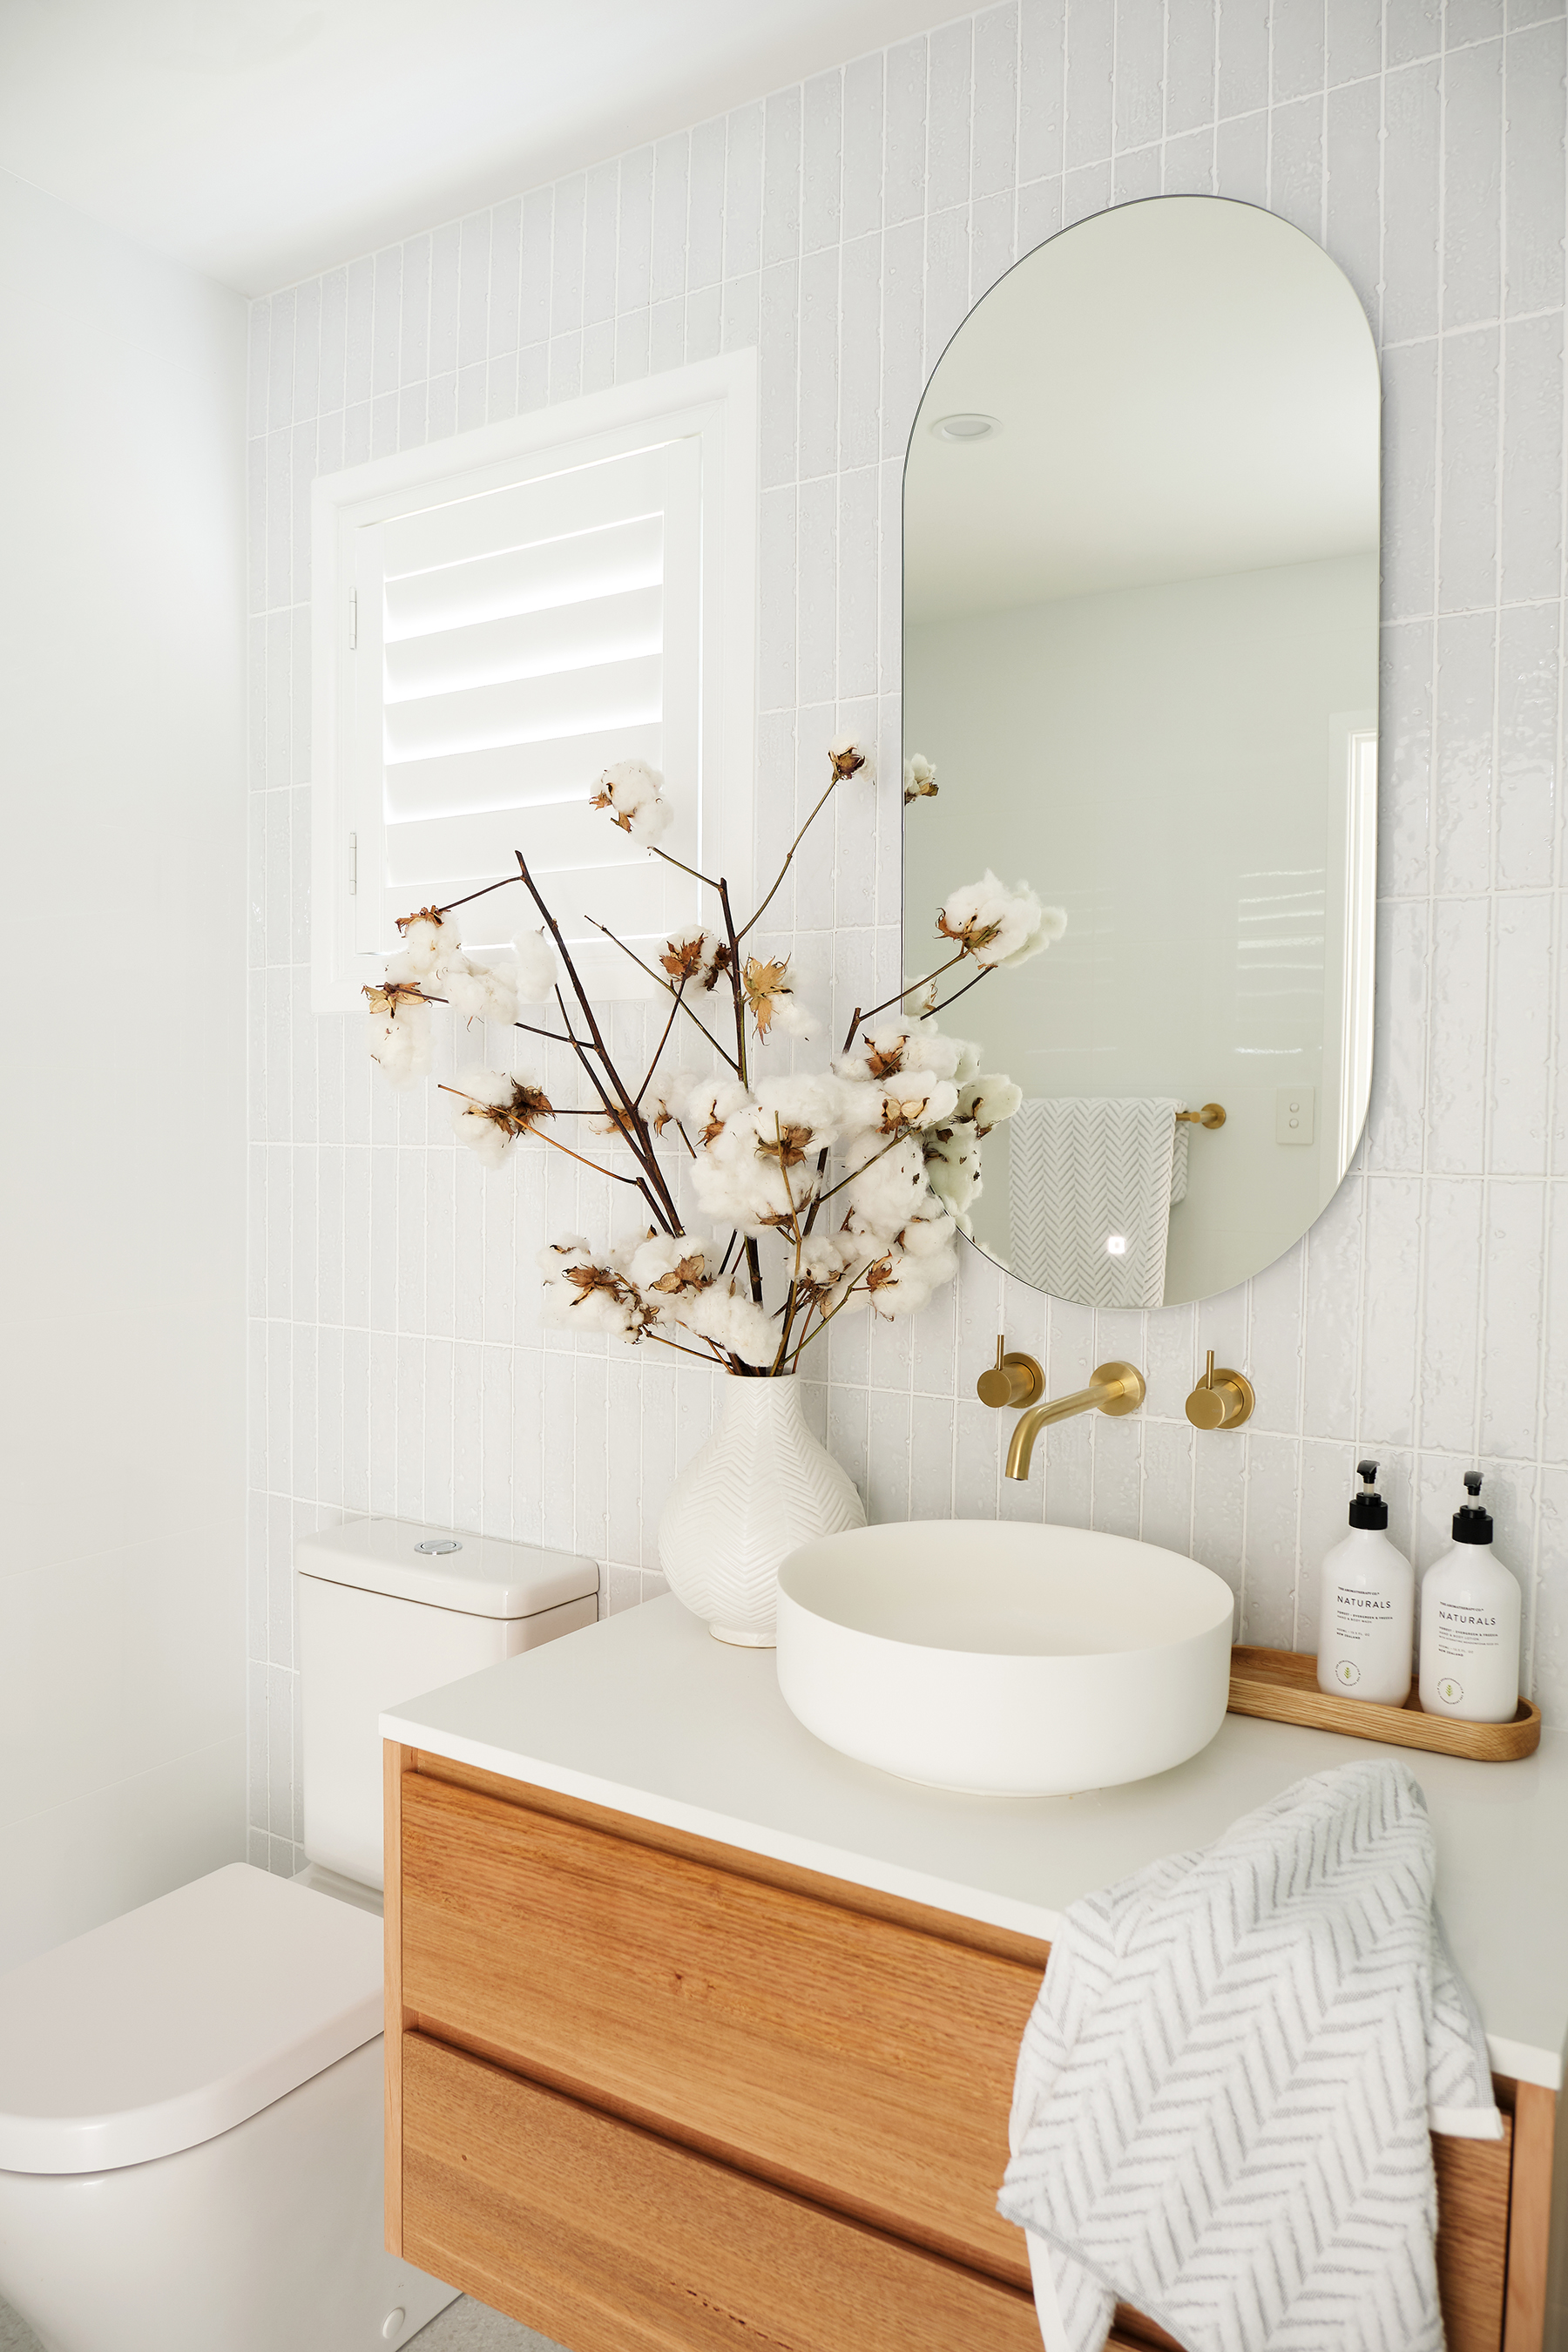
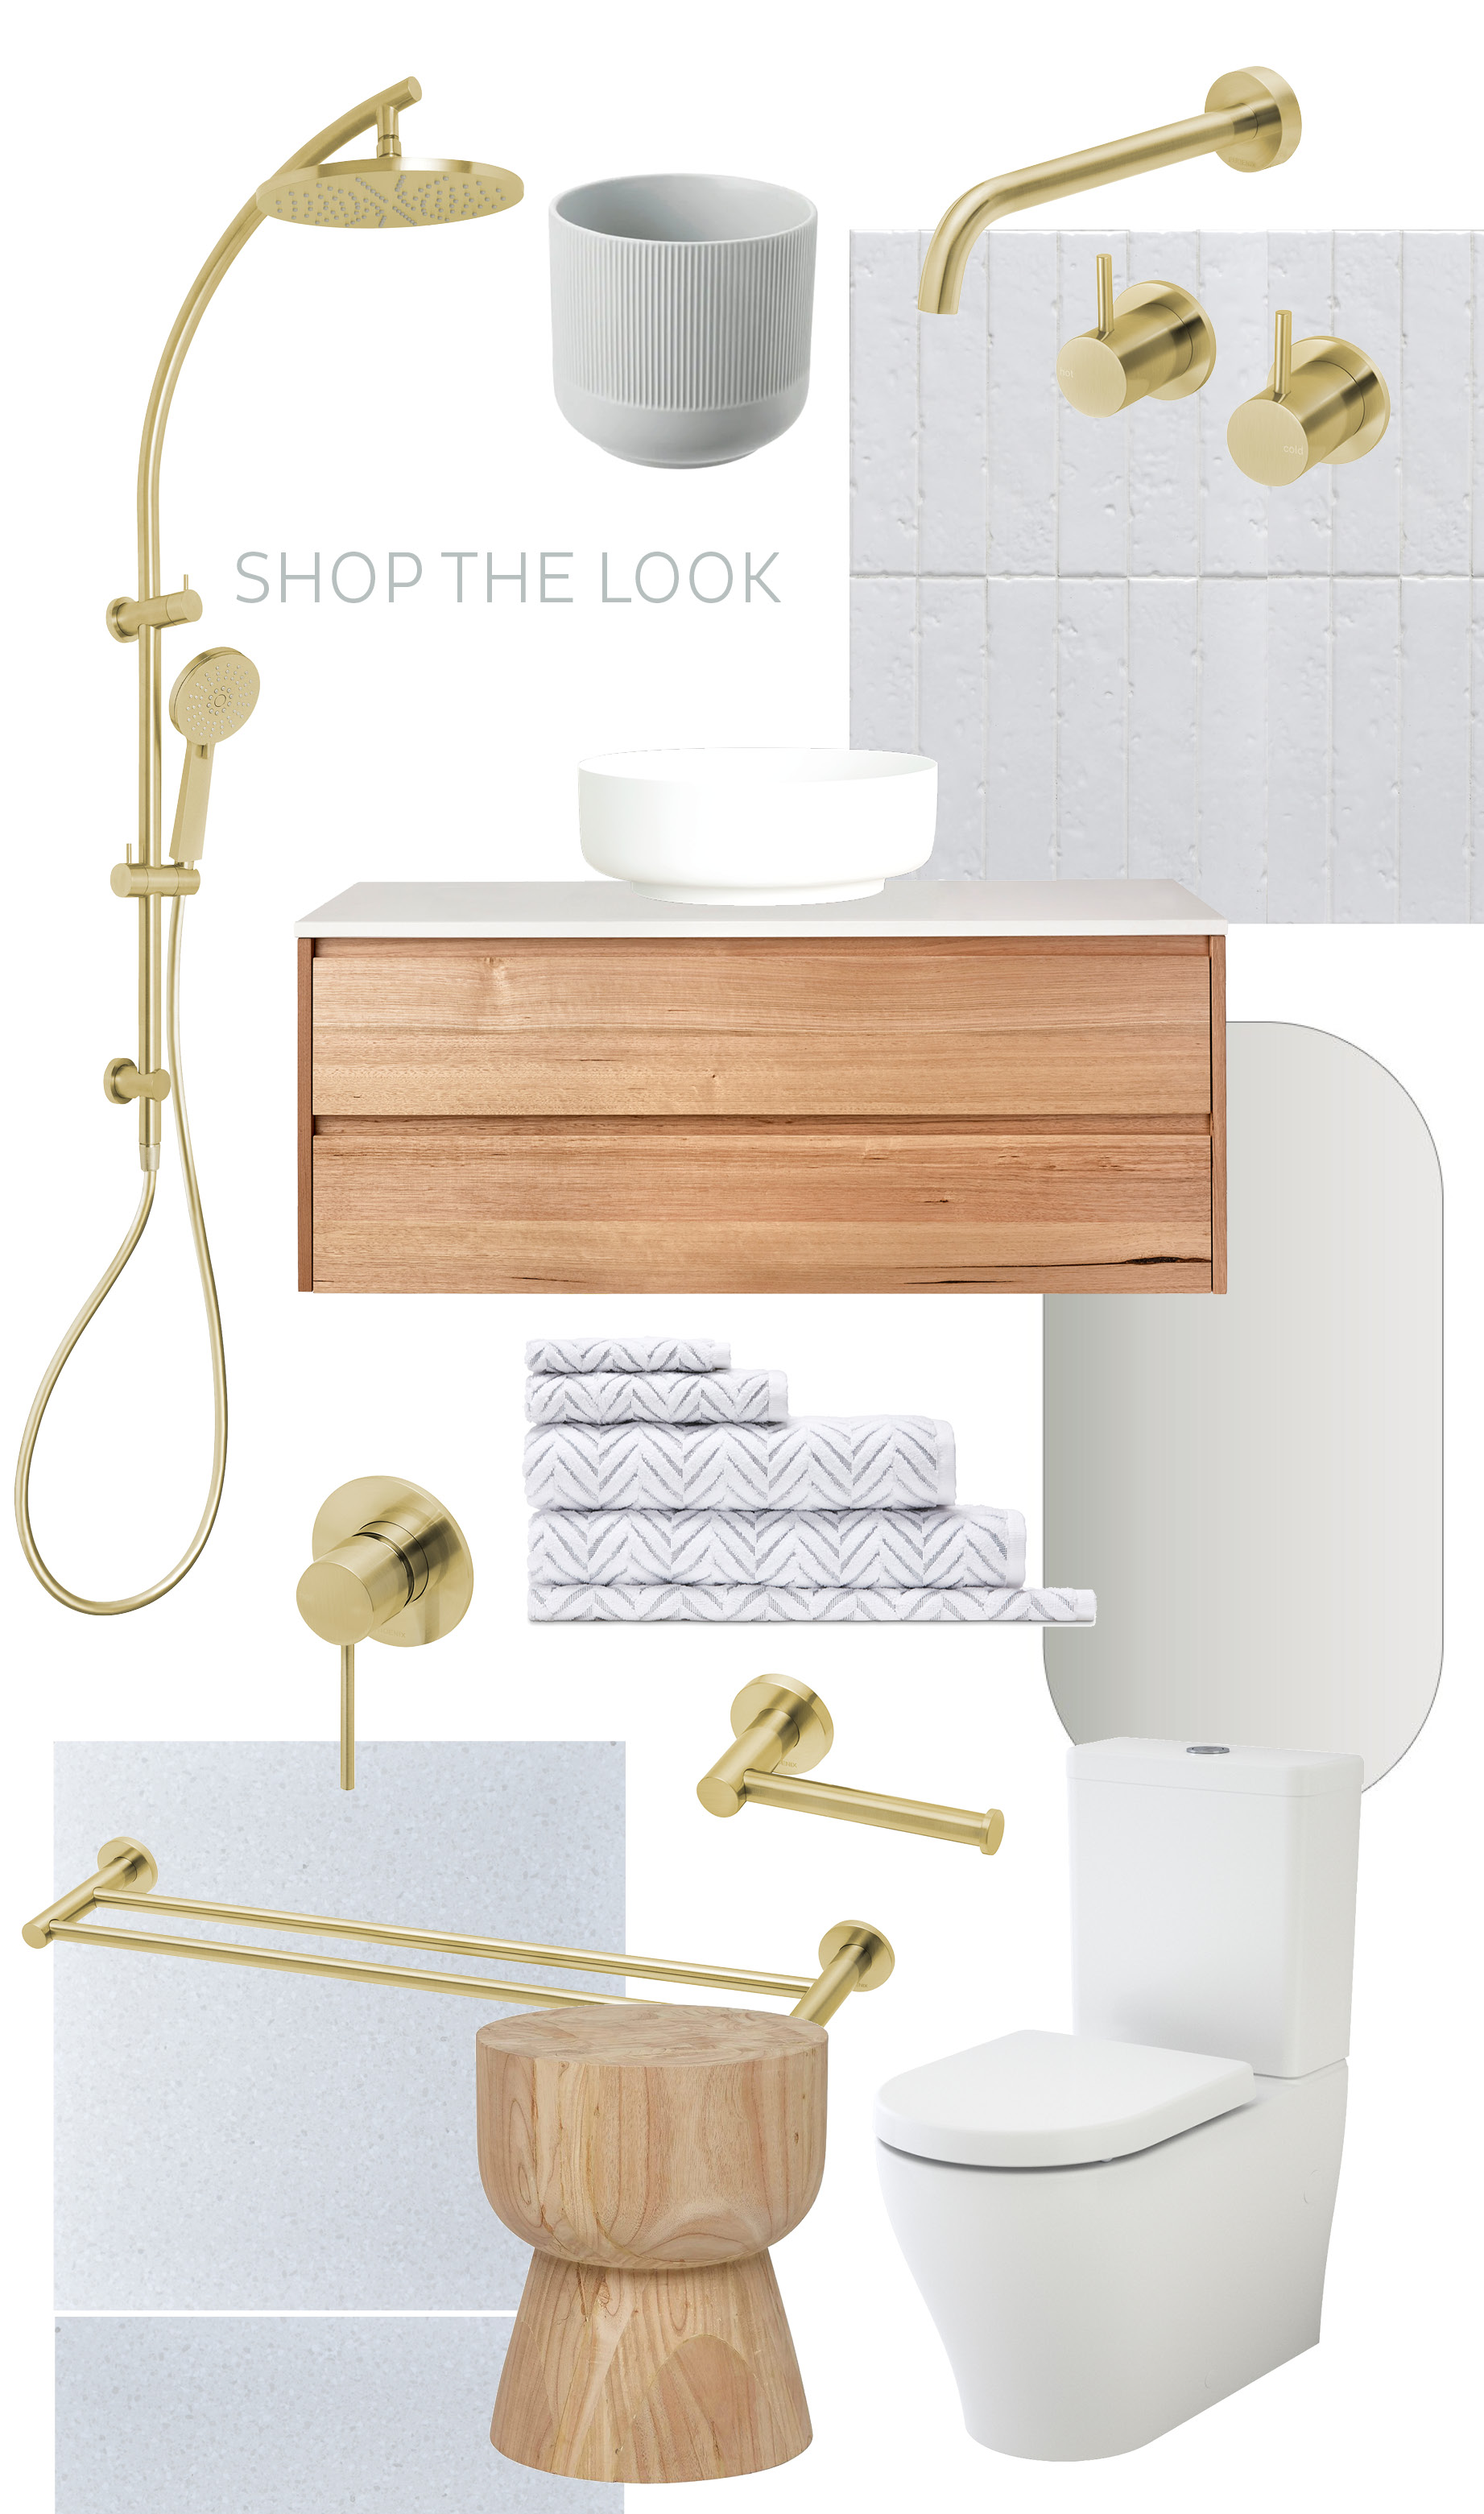
I opted for a Loughlin Furniture ‘Staples’ vanity, handcrafted from Tasmanian Oak. It is such a beautiful piece and really is the hero of the bathroom. It totally warms up the space and goes with that whole modern coastal feel I’m aiming for throughout the house. The ‘Eden’ round basin and storage compartments inside the vanity are also from Loughlin Furniture and they are so dreamy. The basin includes a white pop up waste – you have no idea how excited I was about this. It’s a smooth matte white finish just like the basin itself.
Next up the tiles – I selected the Redfern terrazzo look tile in white for the floor and the Albert Park tile for the feature wall (in full white gloss) from Tile Cloud and could not be happier with my selections. The feature tile looks more light grey in person (even though they are called full white) and they are each hand made - so no two tiles are the same. I love the subtle texture in them and they are probably the most-asked about product in my bathroom when I post it on my Instagram stories! What I love about Tile Cloud is that you can select 5 samples on their site for just $15 – they send them out to you and it makes the decision process a whole lot easier when you can look at the samples in your own home. The plain white gloss tiles on the other three walls were from National Tiles and just $9.95 per square metre. My top tip for those on a budget would be to do a cheap tile like this on most of the walls, and just select one wall to be the feature (usually this would be the wall with the vanity on it) and splash out on something a little more fancy or bold.
For the tapware I knew exactly what finish I wanted – brushed gold! Having had a Phoenix sink mixer in my last home I knew the quality was top notch and had to go Phoenix again in the new home. I love every single piece – the Vivid Twin Shower is probably my favourite though – it’s heavenly to go for a shower underneath that large showerhead, and I adore that curved detail on the shower arm. The matching Phoenix accessories like the towel rail and toilet roll holder also give the bathroom a touch of luxe. It honestly feels like I’m in a boutique hotel bathroom.
The LED mirror, shower glass panel and brass clips from Highgrove Bathrooms. A single glass panel has really elevated the space - it’s not a huge bathroom so I didn’t want the shower to feel closed in by having a door on it. I liked the idea of it being open. I chose a 1.2m long glass panel and it really delivers on limiting water splashes on the bathroom floor. The brass clips are one of my favourite little details in this room and at just $10 each they certainly are one the cheapest items in the space. The LED mirror has a discreet button on it and I love the soft glow it gives to the bathroom at night. It’s also available in two round sizes. The long shape of this one was perfect for my bathroom and helped to balance out the height of the window next to it. Highgrove Bathrooms have really affordably priced bathroom products so you should check them out if you’re renovating.
Last but certainly not least – it’s the beautiful plantation shutters from DIY Blinds. These really just finish the space off beautifully – it makes the room feel more finished and I’m in love with the smooth white finish. I’ll definitely include some of their plantation shutters in the rest of the house – the quality of them are just superb (and quite affordably priced)!
To say I’m thrilled with the bathroom renovation would be an understatement. I’m absolutely ecstatic with the final result and have to keep pinching myself that this is really my bathroom! It just feels so much bigger and lighter now!
I’ve had lots of questions on my Instagram stories about the budget for the bathroom and whether I got a builder in or project managed it myself. I’m going to do another blog post that goes into more detail about that as I know you all like to know those types of details, so stay tuned!


